Newsletter Subscribe
Enter your email address below and subscribe to our newsletter
Enter your email address below and subscribe to our newsletter
Free Tools


AI Fashion Models
Showcase outfits on AI models

Cleanup Pictures
Remove unwanted objects

Background Changer
AI generated instant backgrounds

Clothing Recolor
Replace color in 1 click

Image Recopyright
Get reimagine royalty-free photos

Background Remover
Transparent, or any color background

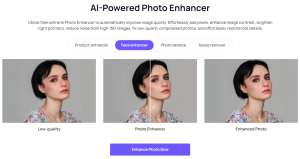
Photo Enhancer
Improve image quality
Download APP
Increasing the pixels on a photo has various benefits you might not know, which is probably why you are here. Pixels are elements in images that define their clarity, and manipulating them determines the quality of the image. The concept of increasing the pixels that exist in an image is to get a larger one without losing its clarity.
What aspects surround maintaining and increasing pixels in the photo you have? What methods will help you retain and increase the pixels in your photo properly? These are questions that you probably have on your mind and we are here with the answers. So let’s dive into the topic and satisfy your curiosity on how to increase pixels on a photo.
The first step to knowing what results you will get is to understand what pixel resolution is and how it works. Pixel resolution, which you will mostly observe it’s name as PPI, is the pixel per inch in a photo. An image with high resolution means there is more PPI in the image, and it goes the opposite way for those with low resolution.
Now, how does the amount of PPI in an image affect your workflow in manipulating the photo effectively? Well, more PPI in a photo means it is of higher resolution and will not lose much details when enlarged. It also means that your images will look less blurry when enlarged if they have more pixels and vice versa with fewer pixels.
If you are wondering how you can know how many pixels are in a photo, then you dont have to do much. Most times, you find it in the image information, which will include the format of the image giving more details. You will mostly see the pixel images in the format 1080 X 1080, which signifies 1080 pixels by 1080 pixels. Higher resolution comes with higher values.
Several methods that work to increase pixels in a photo have come and gone, making their way across the internet. However, there are two methods taking the spotlight currently, both online and offline when working to increase image pixels. These two methods are the use of interpolation and AI image enhancers which give two different kinds of experience.
The difference between these two approaches to increasing image pixels is the way they are used for the process. Interpolation exists as a technique that certain or most tools implement to help you achieve the result you want. AI enhancers, on the other hand, are more of tools rather than techniques and offer a less steep learning curve to use.
You might be wondering what benefits these two offer, why you should consider them, and which is best among them. Well, the short answer is that both are options that will serve you well and give you results. The more detailed answer is that the best for you depends on what you want and how you want to use it. So, let us go into these methods in detail to help you pick.
The process of interpolation is pretty simple: Estimate. Still sounds complicated? Well let us break it down further for you to understand how it works. What happens when implementing interpolation is that your tool estimates pixels based on the intensity of other pixels. It simply means that it replicates new pixels to match the existing ones after estimating the intensity.
In a more complicated sense, tools do the estimation based on the pixel value, which helps them give more accurate results. When you resize an image, especially during an enlargement procedure, this process is the secret behind the clearer image you get. On the other hand, reducing the size of an image will likely not require increasing pixels and won’t need much.
Increasing image size in Photoshop isn’t complicated, as the interpolation technique makes it seem. You aren’t doing any coding despite how steep the learning curve might seem, it’s still not as complicated as you think. So, let’s go through the steps you should follow when increasing your image size in Photoshop to get the best results.
The first step is to download and install the Adobe Photoshop software if you dont already have it on your PC. Head over to The Adobe website and opt-in for a free trial or a paid Adobe Photoshop subscription for long-term use.
Once installed, you can set it up and choose the workflow category you want to use for your edits. It’s best to pick the photography workflow as this matches your edits to resize your image in the best way possible. However, you will still have access to the tools you need to increase image size.
After setting up Adobe Photoshop on your PC, the next step is to start your edits by uploading your image to the interface. You do this by going to the file section in the toolbar and clicking it to display options.
Click Open from the drop-down menu and select the image size option from the list to view the settings. A dialog box will show the image’s information, such as pixel dimensions, document size, etc.
After seeing the dialog box, you can then go ahead and adjust the details of the photo based on pixels to enlarge it. It is best to have specified dimensions and resolution before editing the image to increase or reduce its size.
For example, if you need an image of 2000 X 1333 at 72 pixels per inch, you should have that predefined. In the required section, you will then change the dimensions to match your preferred size and pixel index. Remember that the first value stands for the width, and the second stands for the height, which is marked out.
Once you are done with step three, the next procedure is to select a resampling technique from the list using the dropdown button. You will find this button at the bottom of the dialog box and it will provide you with three different options. There are three different techniques available for you to choose from when resizing images: Bicubic, Bicubic Smoother and Bicubic Sharper.
Bicubic works best for slight adjustments to your images and is optimal for smooth gradients when editing. Bicubic smoother takes this sampling technique up a notch and works best when enlarging an image. On the other hand, bicubic sharper serves are best when reducing the size of images to maintain the pixels and details in them.
Once you do that, all that is left is for you to click the OK button and let the software resize the image for you. Always ensure you check if the image is satisfactory before exporting it as the final download.
If it is, you can proceed with the export and use it for the intended purpose. However, if you aren’t satisfied with the result, you can always undo the edits and run the process again.
Using image AI enhancers is another method that you can consider to help you increase the size of your image. AI image enhancers are a good method to increase image size because of their less steep learning curve. What this means for you is that you need less technical knowledge to get your results.
It gets better as these tools get results faster than other alternatives you might find online. Most AI image enhancers offer automatic image resizing, so you don’t need to do it manually like with every other tool. An example of an AI image enhancer tool is iFoto. We will take you through the steps to use the tool.
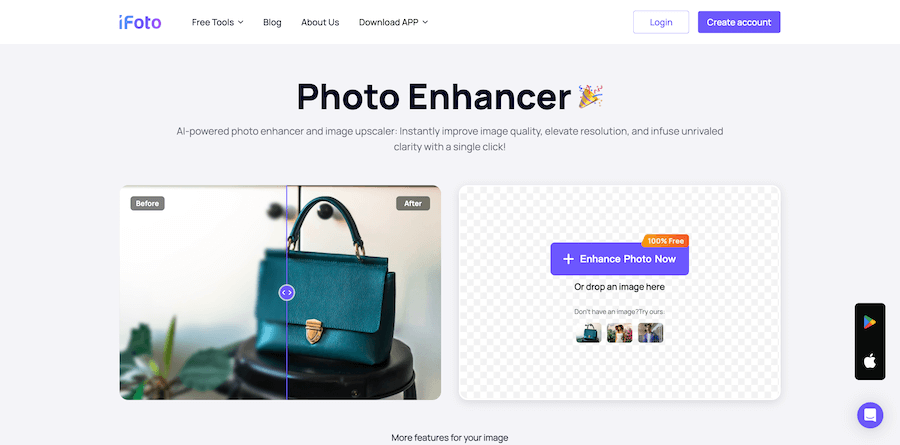
iFoto image enhancer serves as one of the top-quality solutions for enhancing and resizing your photos efficiently. If you are searching for a tool to edit your images while maintaining or improving the details, then it’s your best bet.
The question is, “How do you use this tool to get the best results when editing your photos?” Well, let’s go through the steps to do that and keep you up to speed with its efficient workflow.
The first step is to visit the iFoto website and head to the Image Enhancer section to prepare for your edit. Once you get to that section, log into your existing account or sign up for a free one as a new user if you dont have one already.
Once you set up your account, the next step is to upload your image into the iFoto enhancer section. Click the “enhance photo” button and select your target photo from the directory that pops up on your screen. You can also drag the image into the section for a faster approach.
The platform will redirect you to an online interface where you will see an upscale button and a selection over it. The selection is set at 2048 X 2048, and you just need to click the upscale button to enhance your image.
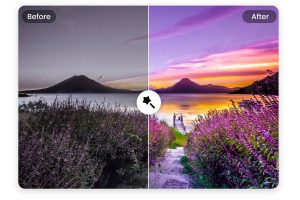
After clicking upscale, the platform will enhance your image and show you the results after it is done. You get to see the before and after of the image you have enhanced and preview it before saving. Once you are satisfied with the results, you can then download the final image and use it for your intended purpose.
Increasing pixels isn’t as complicated as you might think, except if you are interested in the coding aspect of it. However, if your curiosity is based on basic image editing, you can use some tips to improve your results. Here are some of the tips you will find useful:
You should always try to use high-resolution images since the better the image quality, the better the results you get. That means if you want maximum clarity and maintanace of pixels in the image, then you should prioritize using high-quality images.
Always remember that there are certain matches between the sampling methods and your end results. So, if you reduce an image, you should use the matching interpolation resampling technique that works best for that.
Remember to export your image in the highest quality since choosing a lower one will likely erase or reduce the resolution enhancement.
We have come to the end of this complicated topic, and by now, you should know how to increase the number of pixels on a photo. You should also know how to get your image enhancement done and which is the best for you. So what Should you do now? Well, test yourself and improve your images with our recommendations.
iFoto is quick enough to get you your results with the tap of a button.
You can use iFoto for free but you get the most features with a paid package.
Yes, iFoto offers mobile support for both Android and Iphone.
If you want a quick process, then iFoto AI best serves you. However, you can consider Photoshop if you have other intricate edits.
You should use the Bicubic Sharper resampling method in Photoshop for image reduction.