Newsletter Subscribe
Enter your email address below and subscribe to our newsletter
Enter your email address below and subscribe to our newsletter
Free Tools


AI Fashion Models
Showcase outfits on AI models

Cleanup Pictures
Remove unwanted objects

Background Changer
AI generated instant backgrounds

Clothing Recolor
Replace color in 1 click

Image Recopyright
Get reimagine royalty-free photos

Background Remover
Transparent, or any color background

Photo Enhancer
Improve image quality
Download APP
In the last few years, digital media has taken a leap with the integration of several new-age technologies. Now, low-quality images don’t really work and can’t help you grab the attention of your audience. For this, you need to use engaging, high-quality visuals like JPG, PNG, or GIFs. Thankfully, with the help of Photoshop and AI tools, you can easily turn your low-quality images into HD. In this post, I will let you know how to improve image quality in Photoshop and by using an AI-based tool.
If you are still using low-quality photos, then you might consider improving their quality for these reasons:
Adobe Photoshop offers a wide range of tools and features that you can use to improve the quality of your images. Here are some of these Photoshop tools that you can consider exploring.
Mostly, low-quality images suffer from restricted size and resolution. That’s why users take the assistance of Photoshop to upscale their while improving their sizes. You can learn how to improve image quality in Photoshop by upscaling it in the following way:
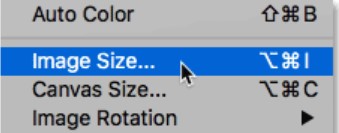
1. Start by loading the image you want to edit on Photoshop images and then select it. Now, go to the Image menu and select the Image Size option.
2. This will open a dedicated window where you can specify the target size for the image. For instance, you can manually enter the horizontal and vertical size of the image here. Make sure you keep the aspect ratio the same so that the image will fit in the right way.
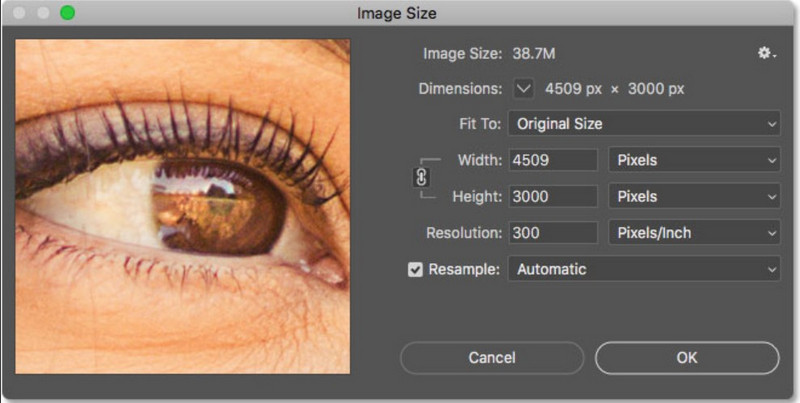
3. Apart from pixels, you can also upscale the image based on different parameters like percentage, points, centimeters, and so on.

Another issue that a lot of people face is that their images are just not sharp enough. After increasing the overall size and dimensions of your photos, they might become blurry. That’s why you can consider following this trick to make your images look sharper.
1. To learn how to improve image quality in Photoshop and make it look sharper, first make a duplicate layer of the image. Now, consider working on the duplicate layer instead so that you can keep the original image intact.
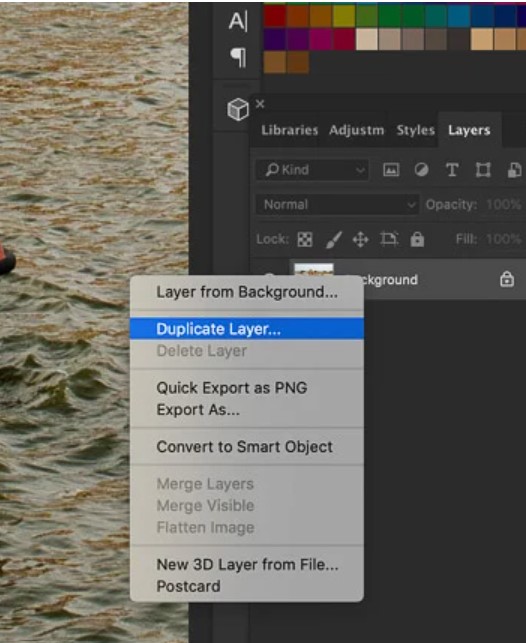
2. Afterward, go to the Filter option in Photoshop and select Sharpen > Unsharp Mask feature.
3. This will open a new window in Photoshop. Here, you can enter the amount of sharpness that you want to apply. You can even manually select the radius and threshold for sharpness to get better results.

Just like sharpness, you can also reduce unwanted noise in your photos. There is an option in Adobe Photoshop that lets us manually denoise images by selecting a preferred algorithm.
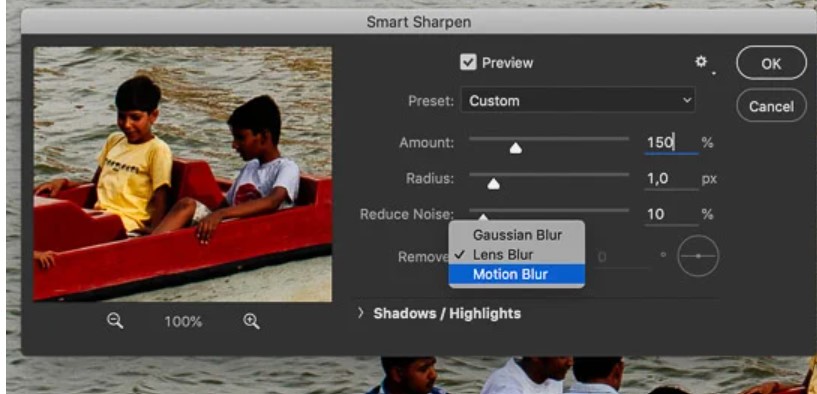
1. Firstly, just load the image to edit on Photoshop and create its duplicate layer.
2. Afterward, you can just head to Filter > Sharpen option and click on the “Smart Sharpen” feature.
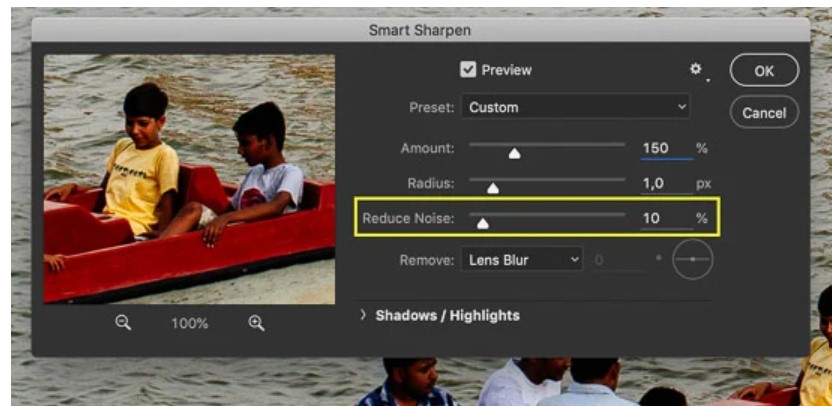
3. Once the Smart Sharpen window opens, you can manually select a level to reduce noise (on a scale of 0 to 100 percent). You can even select the type of noise reduction algorithm you want to apply (Lens Blur, Motion Blur, or Gaussian Blur) to get better results.
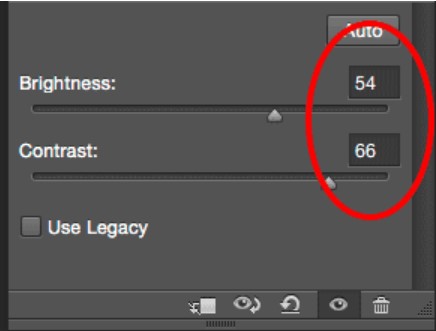
Nobody likes to look at dull pictures, particularly when it comes to marketing and digital media content. That’s why you can use a professional tool like Photoshop to improve the overall brightness and contrast of your images in the following way.
1. To change the brightness and contrast levels of an image in Photoshop, you can first upload the image to the tool and create another layer (if needed).
2. Now, go to the top-most menu on Photoshop, navigate to Image > Adjustments, and click on the “Brightness/Contrast” option.
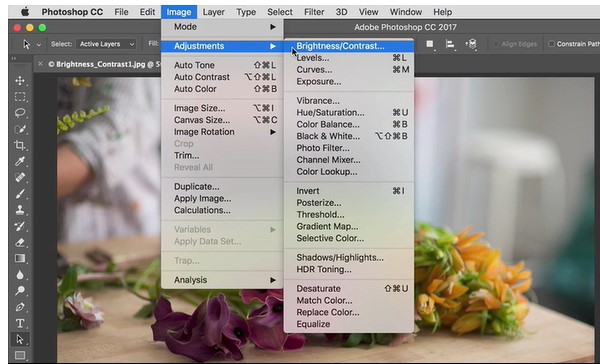
3. As this opens a new dialog box, you can manually change the level of the image’s brightness and contrast. To get instant results, you can also click on the “Auto” option, which will let Photoshop automatically correct the image’s brightness.
Are your images suffering from a lack of colors or there are different colors in them? The decolorization of images is one of the most common issues that people face. Thankfully, you can easily learn how to improve image quality in Photoshop and make color corrections in the following way:
1. Start by loading the photo of your choice on Adobe Photoshop and then visit its adjustment layer. You can do that by selecting the picture and browse to Image > Adjustments > Photo Filter.

2. As the new dialog box opens, select “Color Filter” in the type of filter option. Now, you can select a color to induce and even mark its density. Simply apply the option and feel free to change these properties to get the desired results.

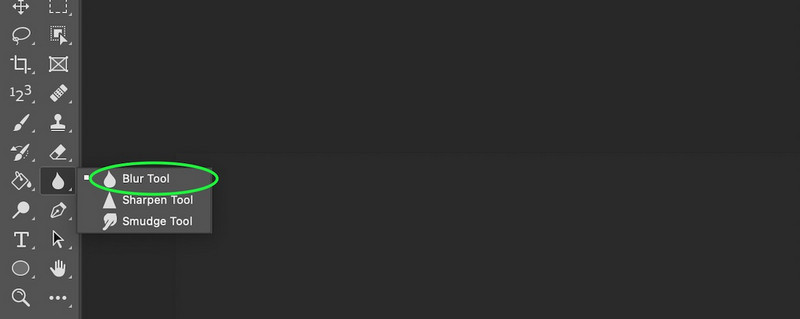
Adobe Photoshop also provides two powerful tools that can help us change the overall appeal of any image – blur and sharpen. For instance, you can use the blur tool to blur the background of any image, and with the sharpen tool, you can easily put any object or individual in focus.
Blur tool
After loading the image on Photoshop, you can just go to its side panel and click on the blur tool. This will change your cursor and you can simply select the objects that you want to blur out. Once you apply the effect, the selected area will go out of focus.
Sharpen tool
The sharpen tool works just opposite to the blur tool. After loading the image on Photoshop, you can select the sharpen tool from the sidebar. Now, all you need to do is carefully mark the object that you want to sharpen. After applying the effect, the object would be focused.
Adobe Photoshop also offers a wide range of filters and effects that you can use to improve the visual appeal of your images. To learn how to improve image quality in Photoshop, you can just upload the image, and go to its Menu > Filters.
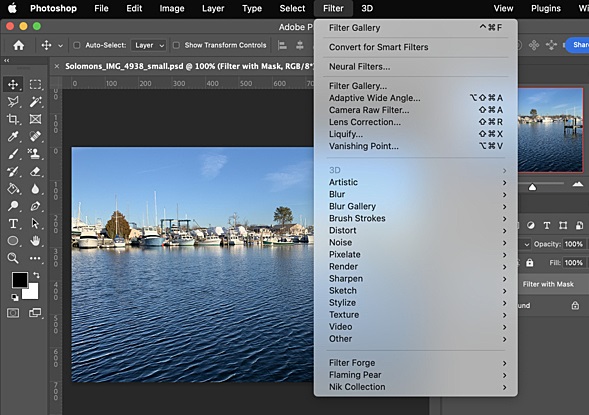
Here, you can see a wide range of filters and readily available effects that are offered by Photoshop. These will be listed under different categories like Artistic, Enhance, Blur, Sketch, and so on. You can just go to any category, apply the filter/effect, and review the results.
As you can see, learning how to improve image quality in Photoshop is not only time-consuming, but requires product experience as well. Not just that – even after using Photoshop, it can end up providing inconsistent results.
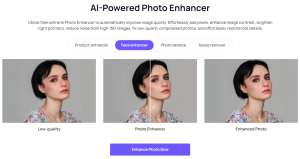
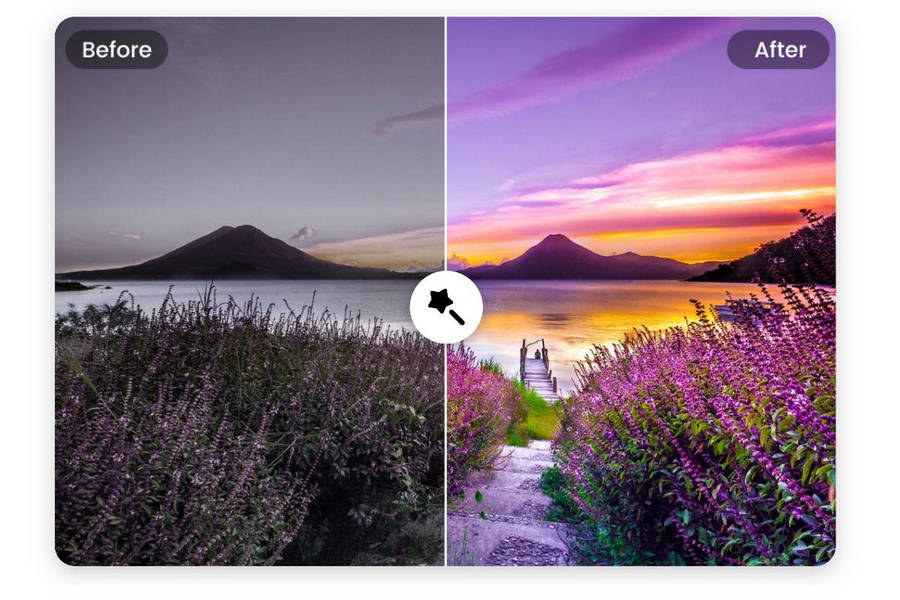
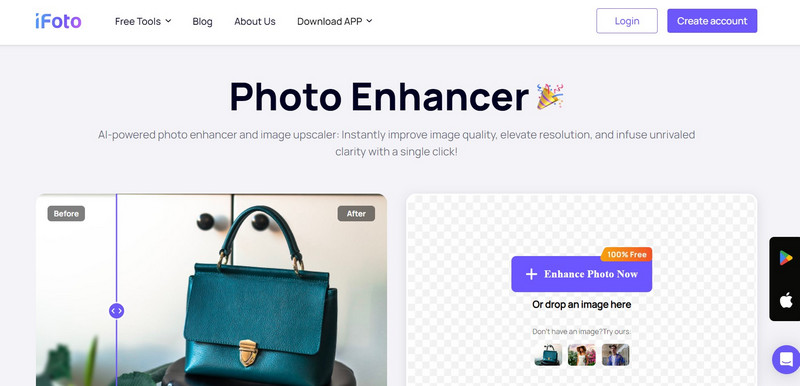
To overcome these issues, you can consider using a user-friendly AI Photo Enhancer from iFoto. A part of the iFoto Studio, it provides a quick and highly effective solution to improve the overall quality of your photos. From reducing noise and blurs to getting rid of issues like decoloring or over-saturation, iFoto Photo Enhancer can overcome all these problems in a single click.
Here’s how you can also take the assistance of iFoto Photo Enhancer to quickly improve and upscale the quality of your images:
Step 1: Upload the photo to enhance
Firstly, just visit the official website of iFoto Photo Enhancer or launch the iFoto app. From here, you can just drag and drop the photo of your choice or manually upload it on iFoto.
Step 2: Improve the quality of the uploaded image
Once the photo is uploaded on iFoto, you can preview the image, and even reupload any other image.
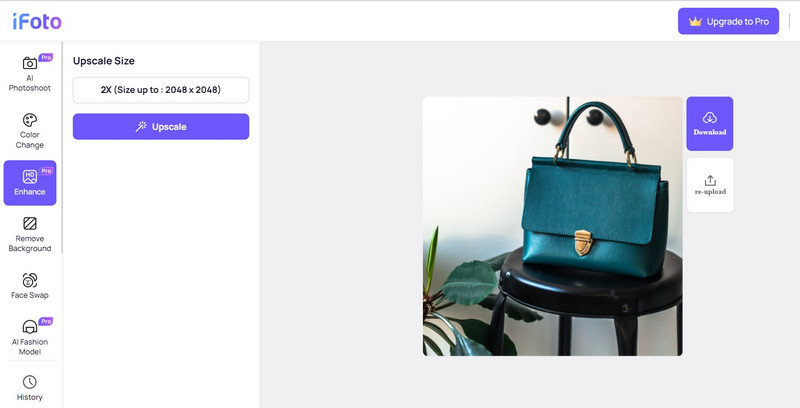
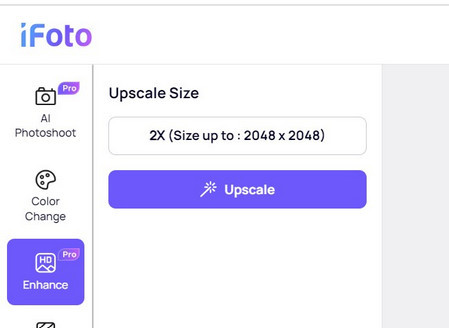
After uploading the image, you can just click on the “Upscaler” button on the side of the web interface or tap on the “Upscaler” button at the bottom of the app.
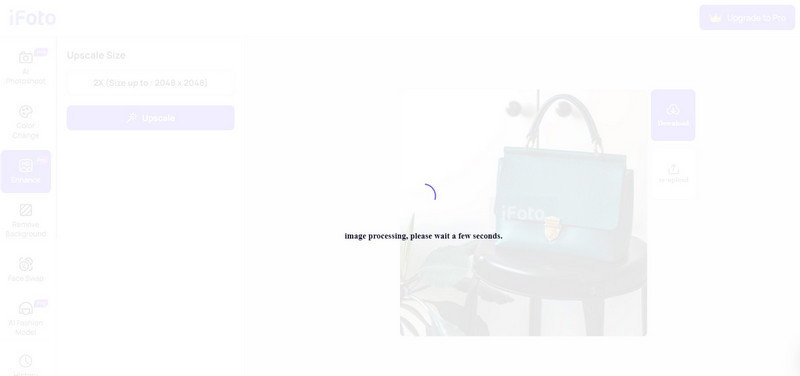
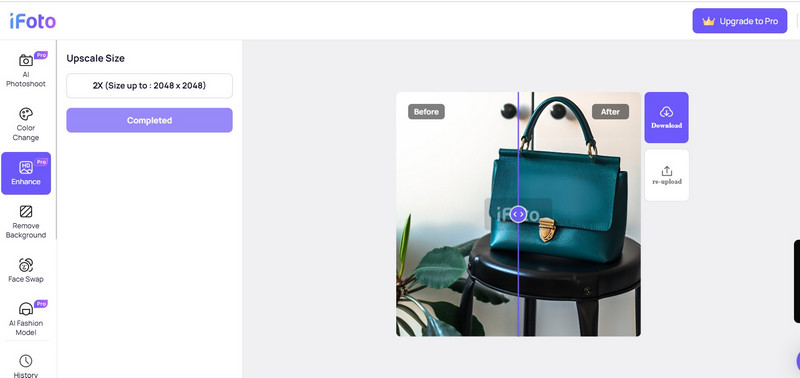
Step 3: Preview results and save the enhanced image
That’s it! You can just hold on for a few seconds and wait as iFoto will automatically remove all kinds of issues with your photo while improving its quality.
In the end, you can just preview the results of the iFoto Photo Enhancer and click on the download icon to save the image.
If you have a low-quality or blurry image, then you can easily take the assistance of Adobe Photoshop to fix it. In this guide, I have provided different solutions that you can also follow to learn how to improve image quality in Photoshop. However, using Photoshop can be a tedious and time-consuming process and you can consider an automated AI-powered alternative like iFoto Photo Enhancer. Using it, you can instantly improve the overall visual appeal of your photo, get consistent and high-quality results, and that too without any manual efforts.