
Iscrizione alla newsletter
Inserite il vostro indirizzo e-mail e iscrivetevi alla nostra newsletter.

Inserite il vostro indirizzo e-mail e iscrivetevi alla nostra newsletter.

Immagina uno scenario: hai scattato una foto fantastica, ma ci sono alcuni oggetti indesiderati che ne stanno degradando l'attrattiva visiva. Bene, ora con l'aiuto di Photoshop o di potenti strumenti di intelligenza artificiale, puoi facilmente rimuovere qualsiasi oggetto dalle tue foto. Dalla pulizia degli scatti di prodotti al rendere più accattivanti le foto di paesaggi, ci sono così tanti risultati che puoi ottenere in questo modo! Qui, ti farò sapere come rimuovere oggetto dalla foto in Photoshop utilizzando il suo strumento timbro clone e la sua migliore alternativa basata sull'intelligenza artificiale.

Se ti occupi di editing visivo, allora dovresti già conoscere i diversi utilizzi di Photoshop. Ci sono strumenti e funzionalità dedicati nello strumento che possiamo usare per rendere le nostre foto più accattivanti.
Uno di questi strumenti è il timbro clone, che duplica i pixel da una parte di un'immagine e li applica senza soluzione di continuità a un'altra. È rappresentato da un'icona di timbro di gomma nella barra degli strumenti di Photoshop e funziona sul concetto di clonazione e timbratura dei pixel sulle aree desiderate.
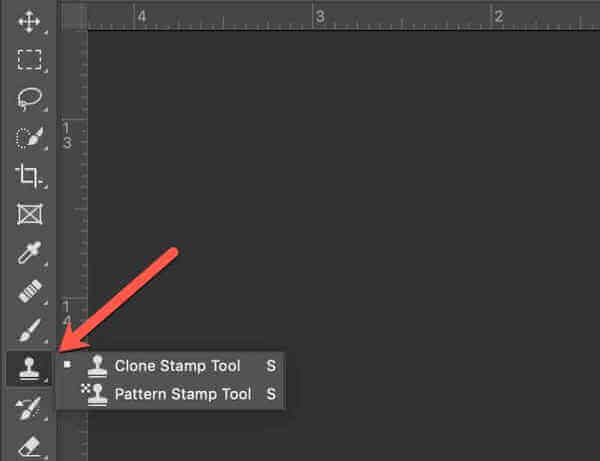
Tuttavia, l'uso principale dello strumento timbro clone è la rimozione di oggetti indesiderati o distrazioni dalle fotografie, come macchie di polvere, cavi elettrici, persone, ecc.
Come funziona il timbro clone?
Lo strumento timbro clone ottiene risultati impeccabili fondendo i pixel delle aree circostanti, assicurando che le parti modificate si fondano perfettamente nel resto dell'immagine. Utilizzando il timbro clone, puoi mantenere l'autenticità e l'integrità della fotografia originale rimuovendo al contempo qualsiasi oggetto indesiderato.
Ora che conosci le basi dello strumento timbro clone, impariamo come usarlo per rimuovere oggetto dalla foto in PhotoshopEcco una guida passo passo che può aiutarti a usare lo strumento timbro clone di Photoshop come un professionista:
Passaggio 1: carica la foto su Photoshop e seleziona il timbro clone
Puoi iniziare avviando Adobe Photoshop sul tuo sistema e poi caricare la foto che vuoi modificare. Ora, seleziona lo strumento timbro clone dalla barra degli strumenti (sembra un'icona di timbro di gomma come mostrato sopra).
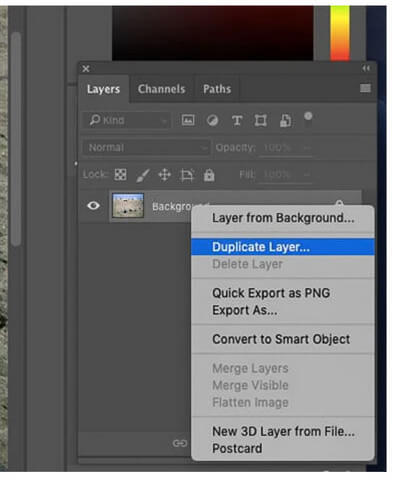
Un trucco da esperto sarebbe quello di duplicare il livello di sfondo (immagine originale) prima di lavorare. In questo modo, puoi facilmente annullare qualsiasi modifica senza influenzare l'immagine originale. Per farlo, fai clic con il pulsante destro del mouse sul livello di sfondo e seleziona la funzione di duplicazione del livello.
Passaggio 2: scegliere un punto campione (fonte)
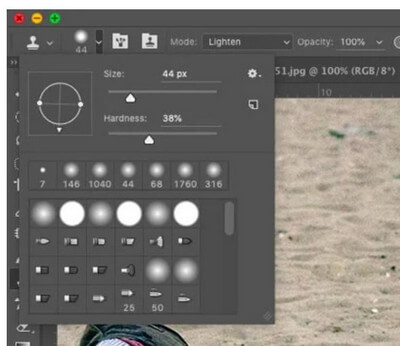
Prima di iniziare la clonazione, devi dire a Photoshop da dove vuoi clonare. Per questo, devi scegliere un pennello morbido dalla barra degli strumenti. Qui, consiglio di selezionare attentamente la dimensione del timbro clone rispetto alla dimensione dell'oggetto che vuoi rimuovere. Se sei nuovo di Photoshop, allora scegliere un pennello di medie dimensioni sarebbe la cosa migliore.
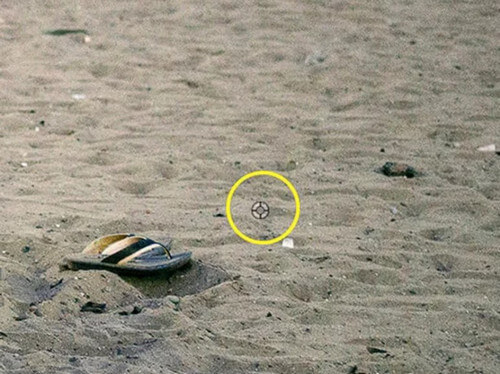
Dopodiché, puoi semplicemente tenere premuto il tasto Alt su Windows o il tasto Opzione su Mac. Ora, fai clic su un'area pulita e non interessata dell'immagine che vuoi usare come punto campione. Questo sarà il tuo punto di riferimento per la clonazione. Nella maggior parte dei casi, è l'area che è appena adiacente all'oggetto che vuoi rimuovere, ma possono esserci anche delle eccezioni.
Passaggio 3: Dipingi sopra l'oggetto di cui vuoi sbarazzarti
Con il punto di campionamento impostato e il pennello regolato, è il momento di iniziare la clonazione. Basta fare clic e trascinare il mouse sull'oggetto indesiderato e sfumarlo gradualmente nello sfondo. Tieni d'occhio il punto di campionamento e regolalo come necessario per mantenere un aspetto naturale.
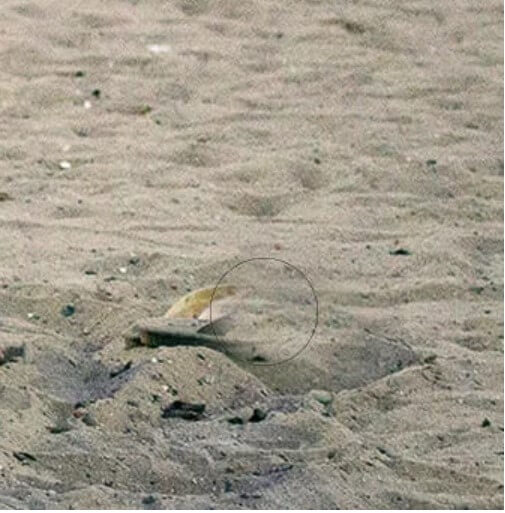
Mentre cloni, fai attenzione a come i pixel si fondono con l'area circostante. Potresti dover regolare le impostazioni del pennello o il punto di campionamento per garantire una fusione uniforme.
Passaggio 4: ripetere e fare un ritocco finale
A seconda della complessità dell'oggetto che stai rimuovendo, potresti dover fare più passaggi con lo strumento timbro clone. Se hai commesso un errore, puoi tornare indietro di qualche passaggio cliccando sul pulsante "annulla" o premendo Ctrl + Z in Windows (Cmd + Z in Mac)
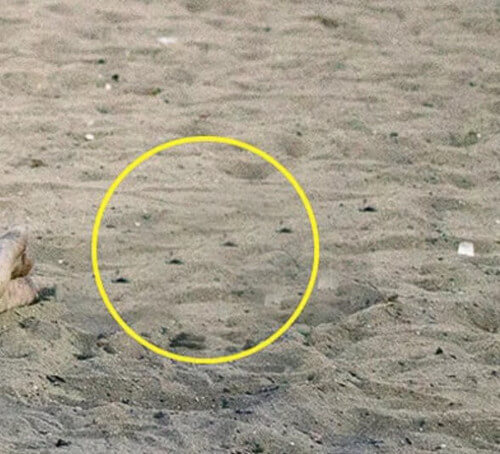
Durante la clonazione, cerca di evitare di creare pattern e di renderla il più naturale possibile. Una volta rimosso l'oggetto indesiderato, allontanati e valuta l'aspetto generale della tua immagine. Potresti dover fare alcuni ritocchi o regolazioni aggiuntive per assicurarti che tutto sembri naturale prima di salvare l'immagine.
Come puoi vedere, con l'aiuto dello strumento timbro clone, puoi facilmente rimuovere oggetto dalla foto in PhotoshopTuttavia, se vuoi padroneggiare l'uso dell'editing e ottenere risultati ancora migliori, allora prendi in considerazione di seguire questi suggerimenti:
Padroneggia l'arte del campionamento
La chiave per una clonazione perfetta sta nello scegliere il punto di campionamento giusto. Sperimenta con diversi punti di campionamento per trovare la corrispondenza migliore per l'area che stai clonando. Ricorda, più il punto di campionamento è vicino all'area target, migliore sarà la fusione.
Cerca di mantenerlo reale
Sebbene sia allettante esagerare con la clonazione e rimuovere ogni piccola imperfezione, è importante mantenere un senso di realismo. Evita pattern ripetitivi e texture eccessivamente uniformi, poiché possono rivelare che hai modificato l'immagine.
Prendila con calma
Prenditi il tuo tempo per ogni tratto di clone, prestando molta attenzione a come i pixel si fondono con l'area circostante. Non avere fretta: un po' di pazienza può fare la differenza per ottenere risultati dall'aspetto professionale.
Ingrandisci e rimpicciolisci
Non dimenticare di ingrandire e rimpicciolire l'immagine mentre lavori. L'ingrandimento ti consente di concentrarti sui dettagli fini e di apportare modifiche precise, mentre l'ingrandimento ti offre una prospettiva migliore sull'aspetto generale dell'immagine.
Utilizzare livelli e maschere
Per darti più flessibilità e controllo sulle tue modifiche, considera di lavorare su livelli separati con maschere di livello. Ciò ti consente di apportare modifiche non distruttive e di modificare facilmente la tua clonazione senza influenzare l'immagine originale.
Prova le modalità di fusione
Lo strumento timbro clone funziona perfettamente con le modalità di fusione di Photoshop, dandoti ancora più libertà creativa. Puoi sperimentare diverse modalità di fusione per ottenere tutti i tipi di effetti e texture nelle tue foto.
Il processo per rimuovere oggetto dalla foto in Photoshop è piuttosto noioso e richiede molto tempo. Oggigiorno, sia i principianti che i professionisti si avvalgono dell'assistenza di strumenti AI per soddisfare le loro esigenze di editing. Uno degli strumenti di editing visivo AI più efficaci è Pulizia iFoto che può aiutarti a pulire le tue foto in pochi secondi.
Anche se non hai alcuna esperienza di editing precedente, puoi rimuovere all'istante gli oggetti indesiderati dalle foto con iFoto Cleanup. Puoi accedere a iFoto Cleanup visitando il suo sito Web su qualsiasi browser o tramite la sua app iOS/Android. Dopo aver effettuato l'accesso al tuo account iFoto, puoi seguire questi passaggi per rimuovere qualsiasi oggetto indesiderato dalle tue foto:
Passaggio 1: carica la tua foto su iFoto Cleanup
Una volta che vai alla home di iFoto Cleanup, puoi semplicemente trascinare e rilasciare la tua foto sulla sua interfaccia. Puoi anche scegliere di cercare la tua foto dal tuo archivio locale e caricarla sull'interfaccia di iFoto.

Passaggio 2: seleziona l'oggetto da rimuovere
Dopo aver caricato la foto, puoi usare il suo pennello per contrassegnare semplicemente l'area/oggetto sull'immagine che vuoi rimuovere. Quando passi il mouse sull'area, questa verrà evidenziata e potrai effettuare la tua selezione in modo preciso.

Per perfezionare la selezione, puoi anche andare al pannello laterale e cambiare la dimensione del pennello. Una volta terminata la selezione, clicca semplicemente sul pulsante "Remover".
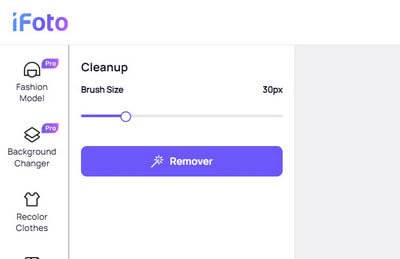
Ora, iFoto farà la sua magia e rimuoverà automaticamente l'oggetto evidenziato dalla tua immagine. Il suo algoritmo AI produrrà una finitura impeccabile, fondendo l'area con lo sfondo in modo che nessuno possa giudicare che l'immagine è stata modificata.

Passaggio 3: visualizza in anteprima i risultati e salva l'immagine
Ecco fatto! Ora puoi semplicemente controllare i risultati finali e persino perfezionarli effettuando qualsiasi altra selezione e ripetendo il processo. Alla fine, puoi semplicemente scaricare l'immagine modificata sul tuo archivio locale e usarla come preferisci!

Questo ci porta alla fine della nostra guida su come rimuovere oggetto dalla foto in Photoshop. Come puoi vedere, ho trovato una soluzione passo dopo passo per usare lo strumento timbro clone in Photoshop che può aiutarti a rimuovere qualsiasi oggetto indesiderato dalla tua immagine. Dal momento che Photoshop non è così intuitivo e può richiedere molto tempo per padroneggiarlo, puoi prendere in considerazione l'utilizzo di iFoto Cleanup. Lo strumento basato sull'intelligenza artificiale è estremamente affidabile e fornisce risultati immediati per la rimozione di qualsiasi oggetto indesiderato dalle tue foto. Puoi usare iFoto gratuitamente e sfruttare i suoi algoritmi AI per soddisfare le tue esigenze di editing visivo in un unico posto.