
Newsletter Subscribe
Enter your email address below and subscribe to our newsletter

Enter your email address below and subscribe to our newsletter
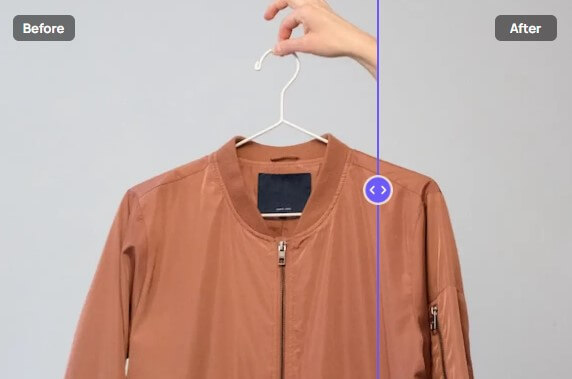
When you take a digital picture, a date and time are usually displayed to indicate when you took the photo. This feature is called a date stamp, and it serves as photo metadata that provides the photographer or whoever views the image with specific details about the photo. While this seems a nice feature, it can also be a genuine inconvenience, especially concerning privacy and personal information. Fortunately, as you will see in this guide, removing the date stamp from the picture is a simple process once you know the proper steps.
This article will explore easy and accessible methods for removing the date and time data from digital photos using online tools and smartphone apps. So, to preserve privacy or share photos without timestamps, keep reading to discover how to remove dates and times from your images.

One of the fastest and easiest ways to remove the date and time data from your photos is with iFoto’s photo cleanup feature, which you can easily access via their website. iFoto is an AI-powered photo editing platform that allows users to access an easy-to-use photo editing interface to create high-quality images for their e-commerce needs. The photo cleanup feature lets users remove date stamps and other private data/information from JPEG images directly from the website in just a few clicks. Here is a step-by-step guide on using the iFoto cleanup feature to remove the date and time from your images.
Visit the website: To get started, open your preferred browser and go to iFoto Cleanup Pictures. Once on the website, create an account using your email address. It is 100% free!
Create an Account: After setting up your account, hover your mouse on the free tools option in the top menu bar. You will see several free tools displayed. Click on “cleanup pictures” at the top right.
Upload JPEG: On the cleanup tool page, you will upload your image or drag and drop an image from your file. If you dont have an image, you can choose one from the website.
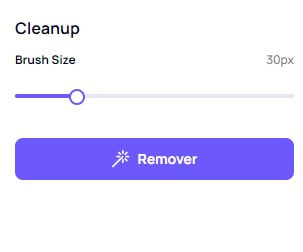
Remove Date and Time: After your image has been uploaded successfully, you can remove the time and date stamp from your image using the brush tool. Feel free to adjust the brush size to get a clean removal. Then click “remover.”
Save and Download: Your image with the date and time stamp removed is ready. Preview the picture and check for any errors. Then click “download”. Your photos will be downloaded without any date or time stamps.

Best of all, iFoto’s cleanup service is free for personal photos. For quick online metadata removal, it’s an easy-to-use solution.

The paint crop tool feature is the most straightforward and accessible tool for removing the date and time stamp from your photos. It is available on your laptop and relatively easy to use by following simple steps. Although this method is easy, it has a few setbacks that might make it a poor option.
Using the crop feature to remove the date and time stamp means cropping out an essential part of your image, like an object or a person. It might change your picture from a portrait view to a landscape view.
Since the crop feature works by cutting out the part of the image with the date and time stamp, it will affect your photo’s dimensions and upset your image’s balance. It is not a great option if the photo is needed in a specific dimension for e-commerce use.
If either of these drawbacks does not affect your photos, here is a step-by-step guide on removing date and time stamps from your photos using the crop feature on your PC.
Another great way to remove the date and time stamp from your image is by using Photoshop. It is a clean and fast way to remove unwanted details from your photos. However, this method might require some skill or experience with Photoshop software. There are two ways to use Photoshop to remove the date and time stamp from your images. You can either use the clone stamp tool or the healing brush.
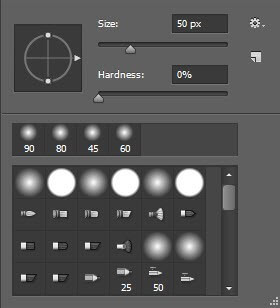
Step 1: Open the image on your Photoshop software. On the left-hand side of the screen, you will select the toolbar and the clone stamp tool. Once done, you will set your preferred brush size and hardness by right-clicking and choosing from the popup.
Step 2: Move your cursor to the area around the date and time stamp, then hold down the “alt key” on your keyboard. It will turn it into a target and allow you to take samples/copies from around the time stamp.
Step 3: Once you have your copies, you can now cover the time stamp with the area you previously sampled. Click and drag the cursor over the date and time stamp and keep clicking till you have entirely covered the time stamp and it completely dissolves into the background.
Step 4: This method might leave some lines and unwanted traces of alterations on the image, which this step will take care of. You will return to the toolbar on the left side and see the “healing brush tool.” Once you have selected this, right-click and choose your preferred brush size and hardness in the popup settings.
Step 5: Hold down your “Alt” key and click around the area of the original date stamp to take samples. Then, using small clicks, just paint over that area until you’re content with how the image looks.
The content aware fill option is another effective way to remove the date and time stamp from your images using Photoshop with the help of the software’s content aware fill feature. Here is a step-by-step guide to get it done.
Step 1: Import your image into your Photoshop software. Select the date and time stamp using the selection tool from the toolbar. You can also use the Magic Wand tool to make the selection.
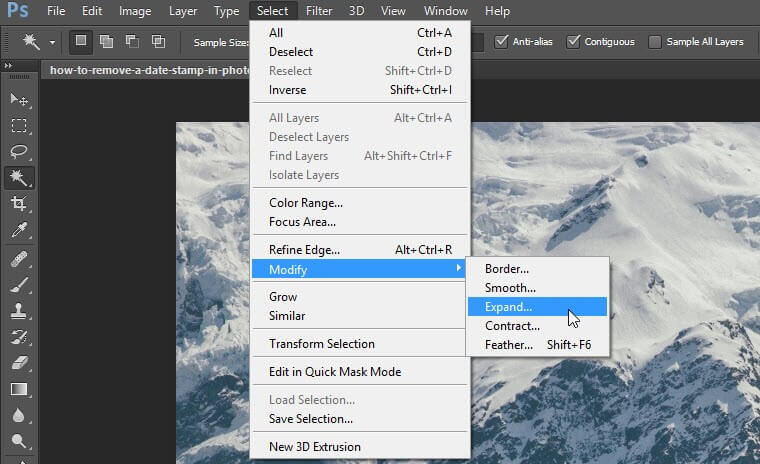
Step 2: The next step is to expand the area previously selected. The reason is to cover a good amount of background pixels. We can develop the background by 4 pixels for the date and time stamp. To do this, Select > Modify > Expand. Then, enter the number of pixels needed and click OK.
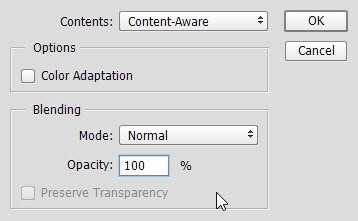
Step 3: Tap the edit button at the top bar and click “Fill.” Next, select Content-Aware in the content section. Click on the blending section and set the Mode to Normal and the Opacity to 100%. Once this is done, here is how it should look like:
Step 4: Once this is done, you can go ahead and deselect the selection around the time stamp by pressing “Cntrl + D.” You will find that the date and time stamp are no longer visible on your image

Using your mobile phone, you can remove the date and time stamp from your image. There are two easy steps to get this done. You can use the crop feature from the photo app on your mobile phone or seamlessly with the iFoto mobile app. Both methods can be used on both Android and iPhone.

Android phones come with a photo app that can be used to view and make minor edits to photos and images on your mobile phone. The app has a crop feature that allows you to crop unwanted items from your photos, such as the date and time stamp. It can be done in a few fast and easy steps.
Step 1: Open your photos app on your Android phone. Click on the “Library” at the bottom-right of your phone screen. Go to the folder with your saved image and open it.
Step 2: At the bottom of the screen, right next to the “share icon,” you will see the “edit” button. Click the edit button, and you will see the option to crop the image. Select the crop tool and adjust the image to crop out the date and time stamp without excessively altering the dimension of the image.
Step 3: At the bottom right, you will see an option to save a copy of the image. Save the copy, and the date and time stamp will be removed from your new image.
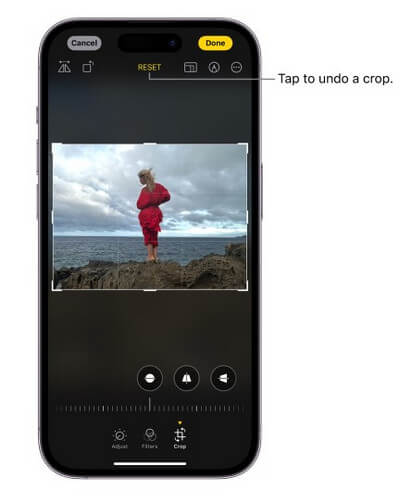
The crop feature on the iPhone photos app also works similarly to that of the Android.
Step 1: Open the photos app and select the image you want to edit so it shows on full screen. Then tap the “edit” button followed by the crop icon.
Step 2: You have two options: crop manually or crop using the standard preset ratio. If you choose to crop manually, you must drag the rectangle to cover the needed area on the image, leaving out the date and time stamp.
Step 3: If you select the preset ratio option, you can choose a suitable dimension that crops out the date and time stamp without altering the content of your image. You can pinch and zoom on your photo for a quick crop, then tap “crop” once you get your preferred edit.
Step 4: Tap done to save your new image with the date and time stamp removed.

You can remove the date and time stamp from an image quickly and easily with the help of the iFoto app. The mobile app is free and easy to download on your Apple or Play Store and can be used on both iPhone and Android devices. Here is a step-by-step guide on how to use it to make the needed edits.
Step 1: Visit your Play Store or Apple Store on your mobile device and download/install the iFoto app on your mobile device, then go ahead and launch the app
Step 2: Once you launch the app, you will see image edit features at the top of your screen. Select the “Cleanup Tool” feature. You can then take/upload a photo to the app using the “upload photo button.” You will see a popup requesting permission for iFoto to access your device’s media; click “allow.”

Step 3: With permissions granted, select your preferred image. You can preview it to confirm it is correct, then go ahead and edit. The app will scan the photo and upload it where you can make your edits.
Step 4: Choose a preferred brush size and hover it over the date and time stamp on your image, marking it in a light purple shade. Once you have covered the date and time stamp, click “remover.” The tool will remove the date and time stamp marked out from your image.
Step 5: Check for any inconsistencies or parts of the date and time stamp that were not appropriately covered, and use the brush and remover to clean it up till you have a clean image without the date and time stamp. You can then go ahead to save and download your photo.
Removing the date and time stamp from your photos and images has always been challenging, especially with the options in this guide. With iFoto, you can make fast and easy edits to your pictures and videos either through the mobile app or directly on the website.